Hosting a TikTok Live event is a fantastic way to directly engage with your audience, share valuable content, and boost your profile’s visibility.
Creating a TikTok Live event is a powerful way to connect with your audience, increase engagement, and elevate your profile’s visibility. By hosting a live event, you can interact directly with followers, share valuable insights, and foster a stronger community. This guide will walk you through each step of setting up a TikTok Live event, ensuring a smooth and effective process.
Why Host a TikTok Live Event?
TikTok Live events offer a unique opportunity to engage with your followers in real-time. By scheduling a live event, you can give your audience a chance to tune in, interact, and get excited about your content. Live events also increase your visibility, helping you attract new followers and strengthen your online presence.
Step 1: Open the Menu
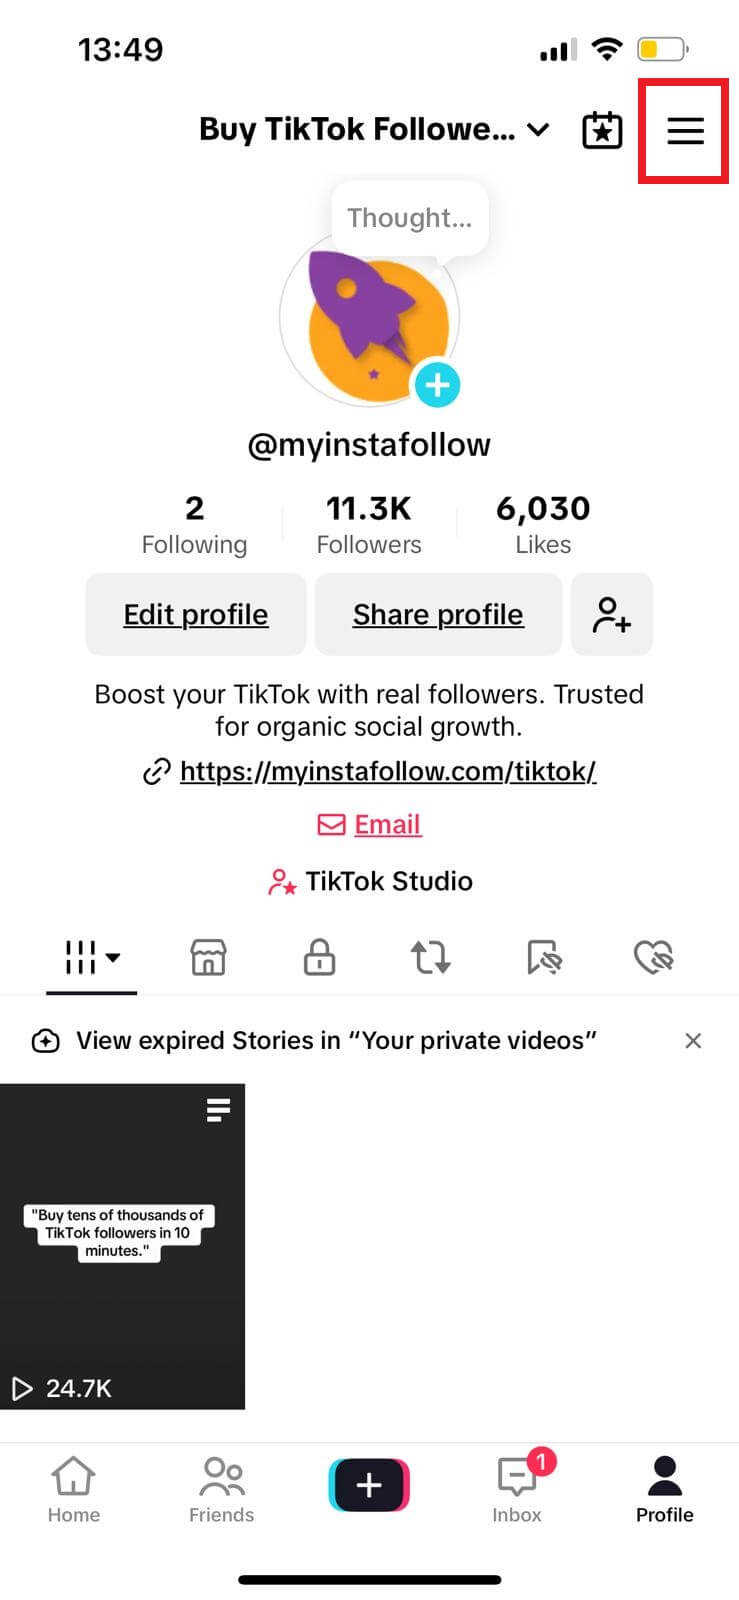
To start, navigate to your TikTok profile and click on the three horizontal lines at the top-right corner. This will open up the main menu.
Step 2: Access Settings and Privacy
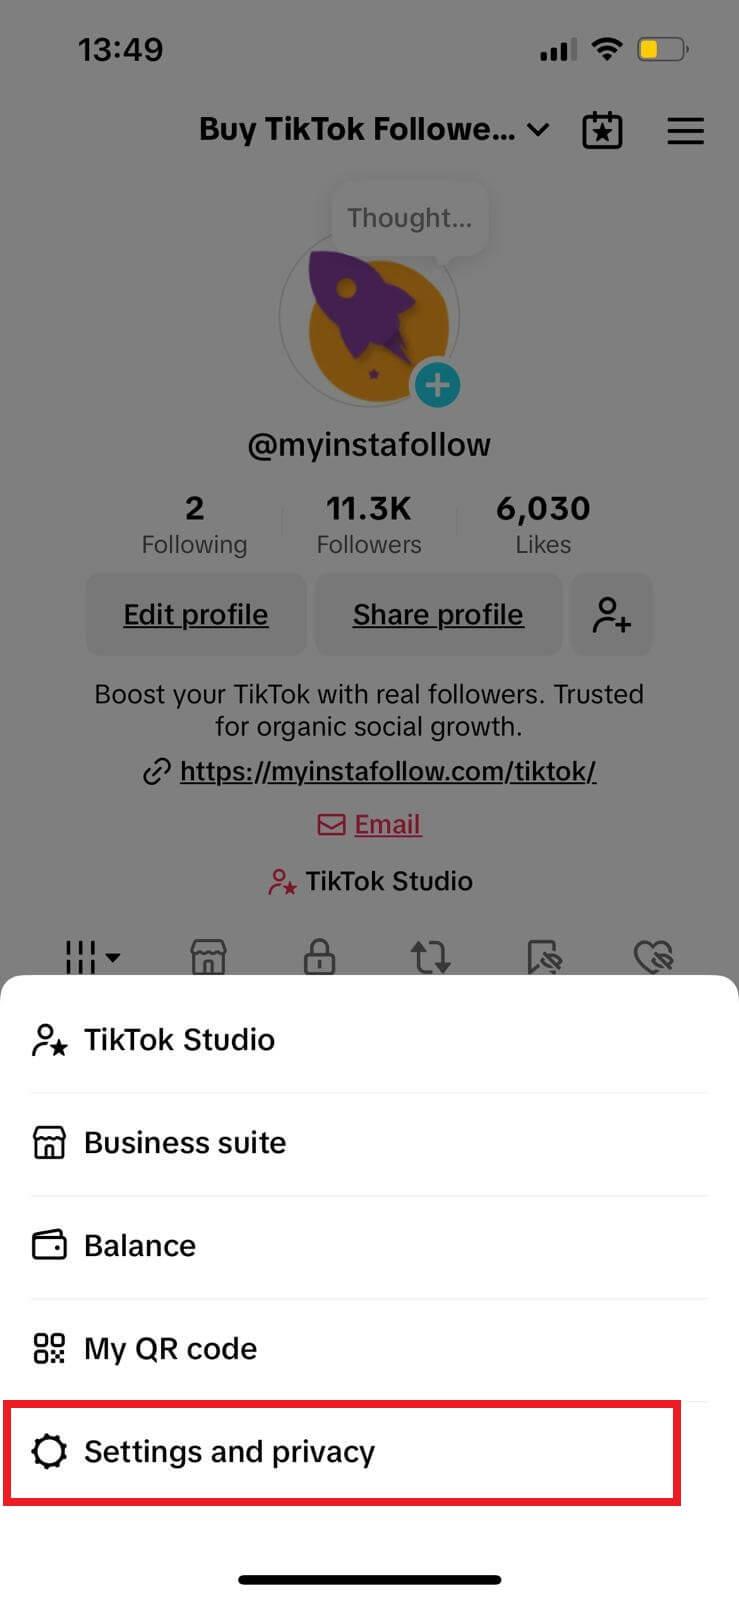
From the menu, select Settings and Privacy to manage your account's various options, including your Live streaming settings.
Step 3: Select the LIVE Option
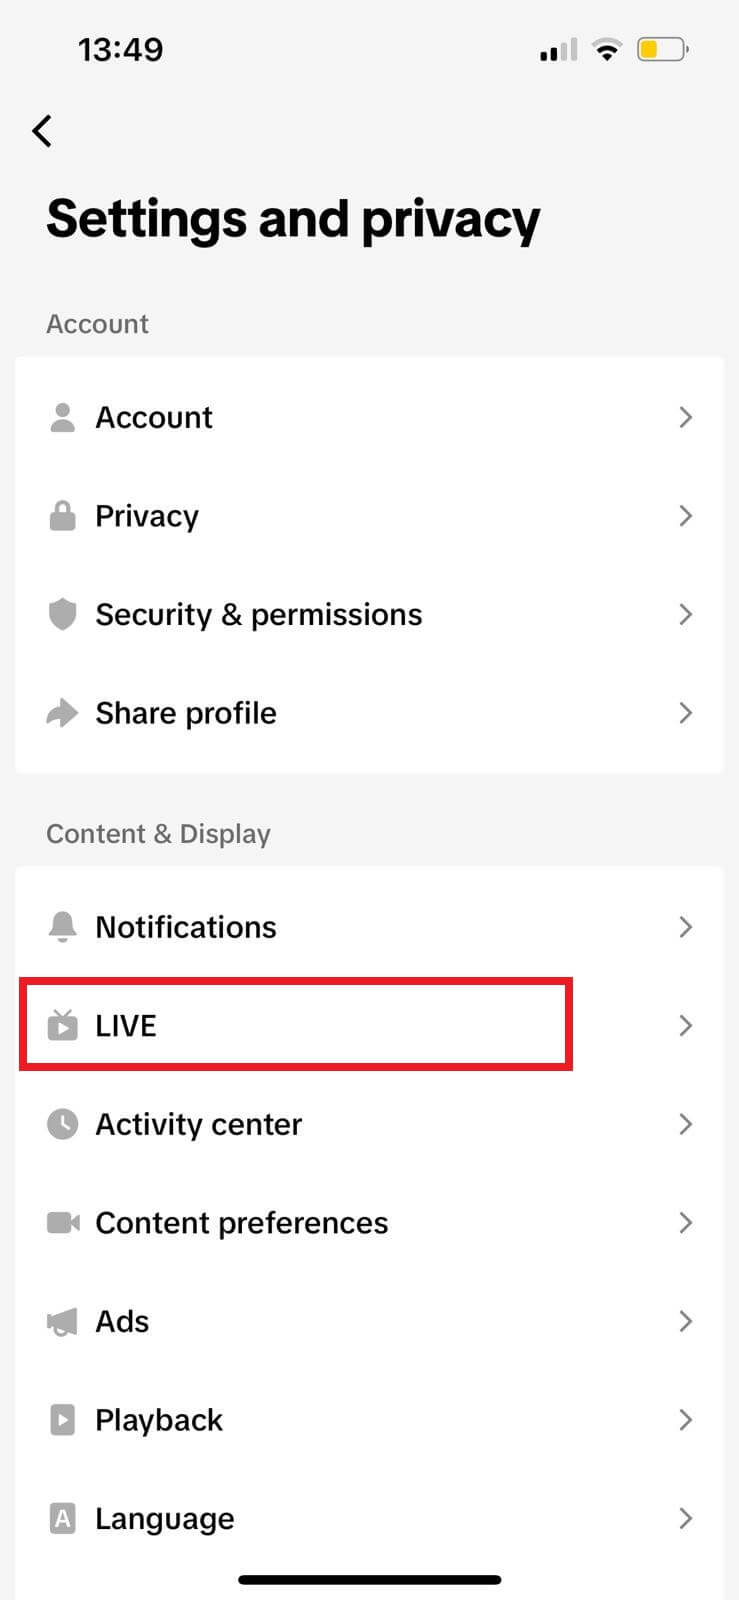
Scroll down to find the LIVE button under the Content & Display section. Click on this to access settings related to TikTok Live streaming.
Step 4: Choose LIVE Events
Inside the LIVE section, click on LIVE Events to begin the process of creating a scheduled live event. This is where you can set up event-specific details.
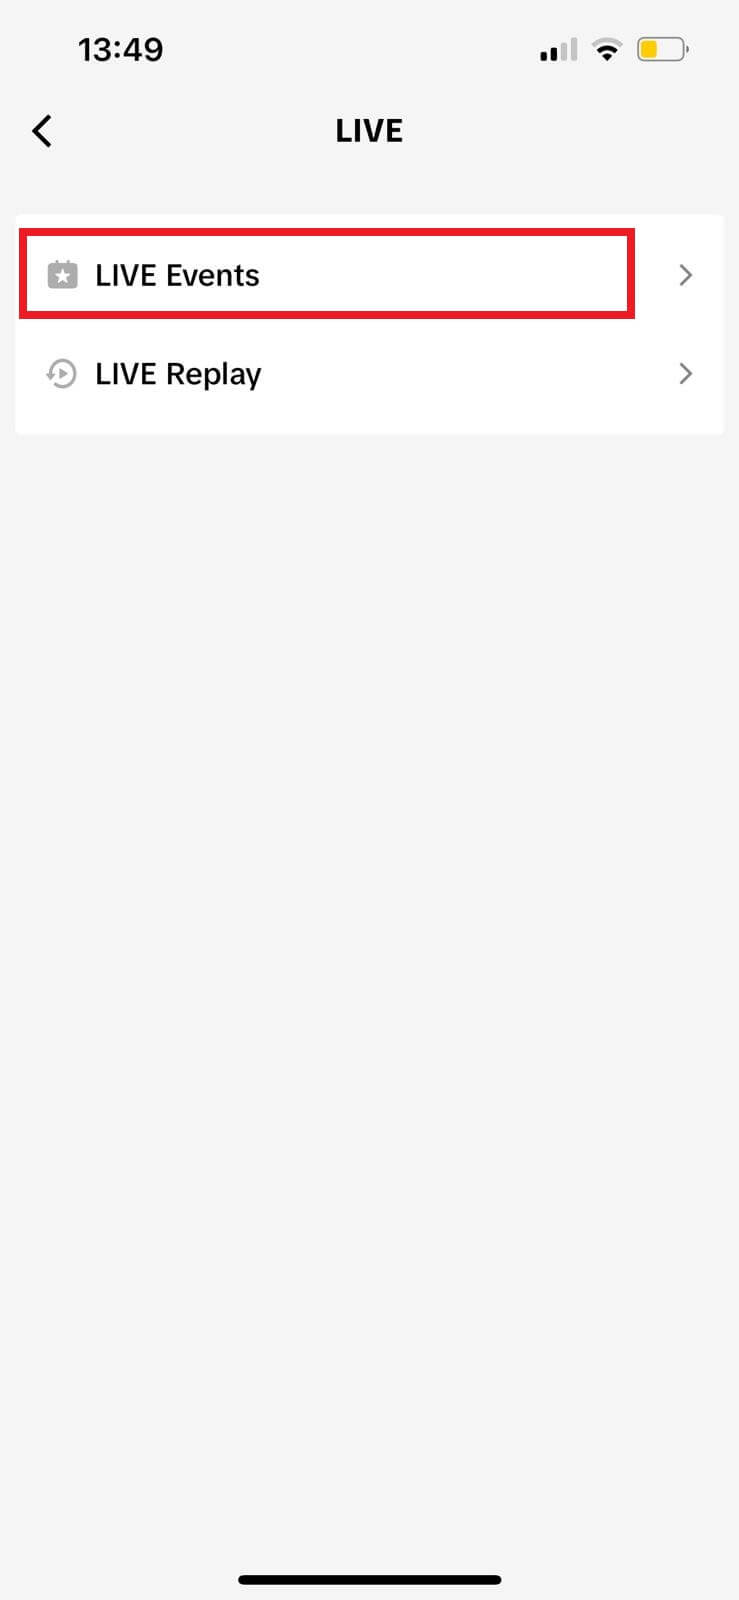
Step 5: Start Creating an Event
Click on Create an event to open the event creation form. This will allow you to input important information about your event, such as the title and timing.
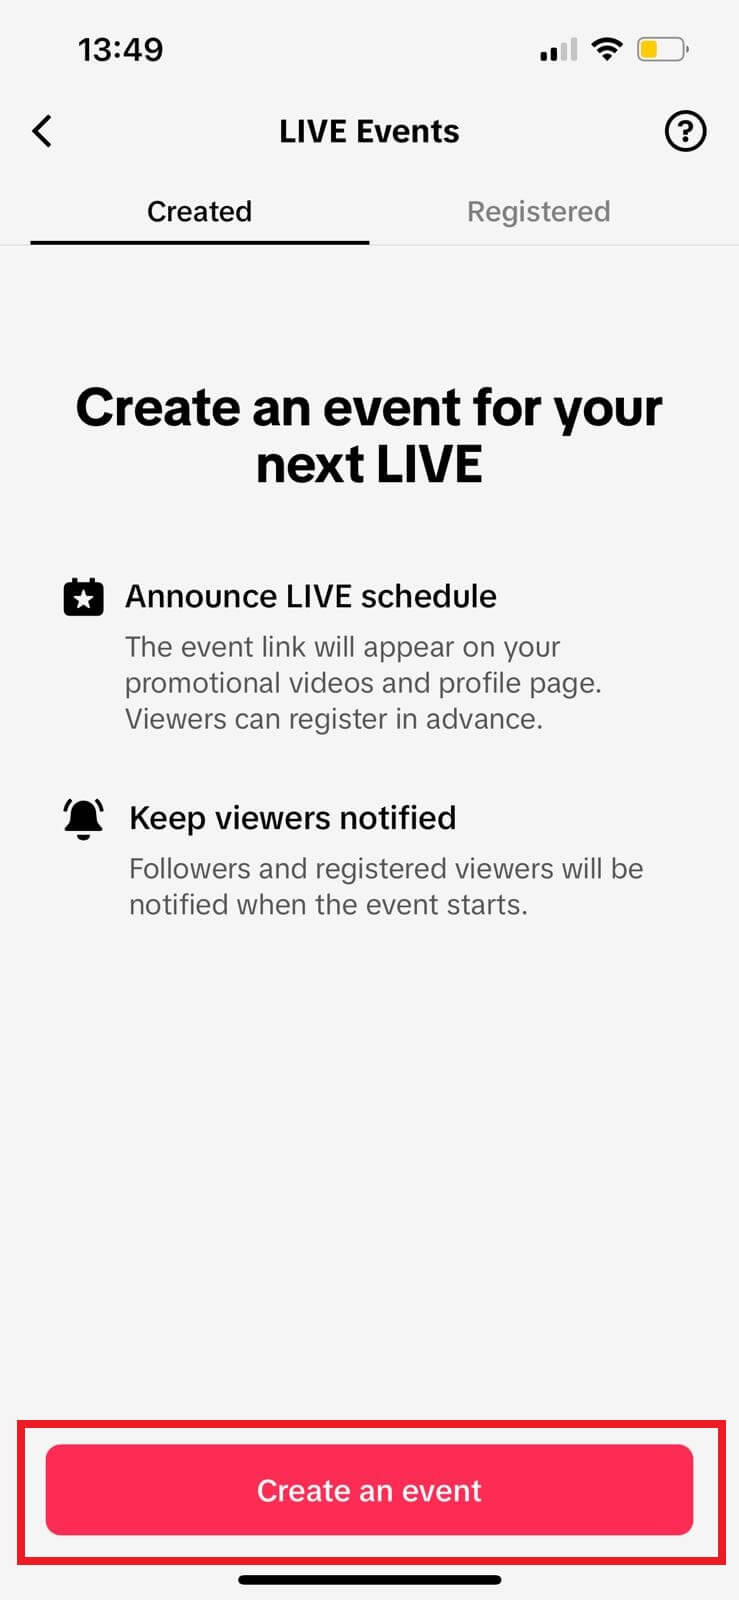
Step 6: Fill in Event Details and Create
Now, enter the details for your event:
- Event Name: Choose a short, catchy title that highlights what the event is about.
- Start Time: Set the date and time for your event, ensuring it aligns with when your audience is most active.
- Description: Provide a brief description to intrigue viewers and let them know what to expect.
Once everything is filled out, click Create to finalize the setup.
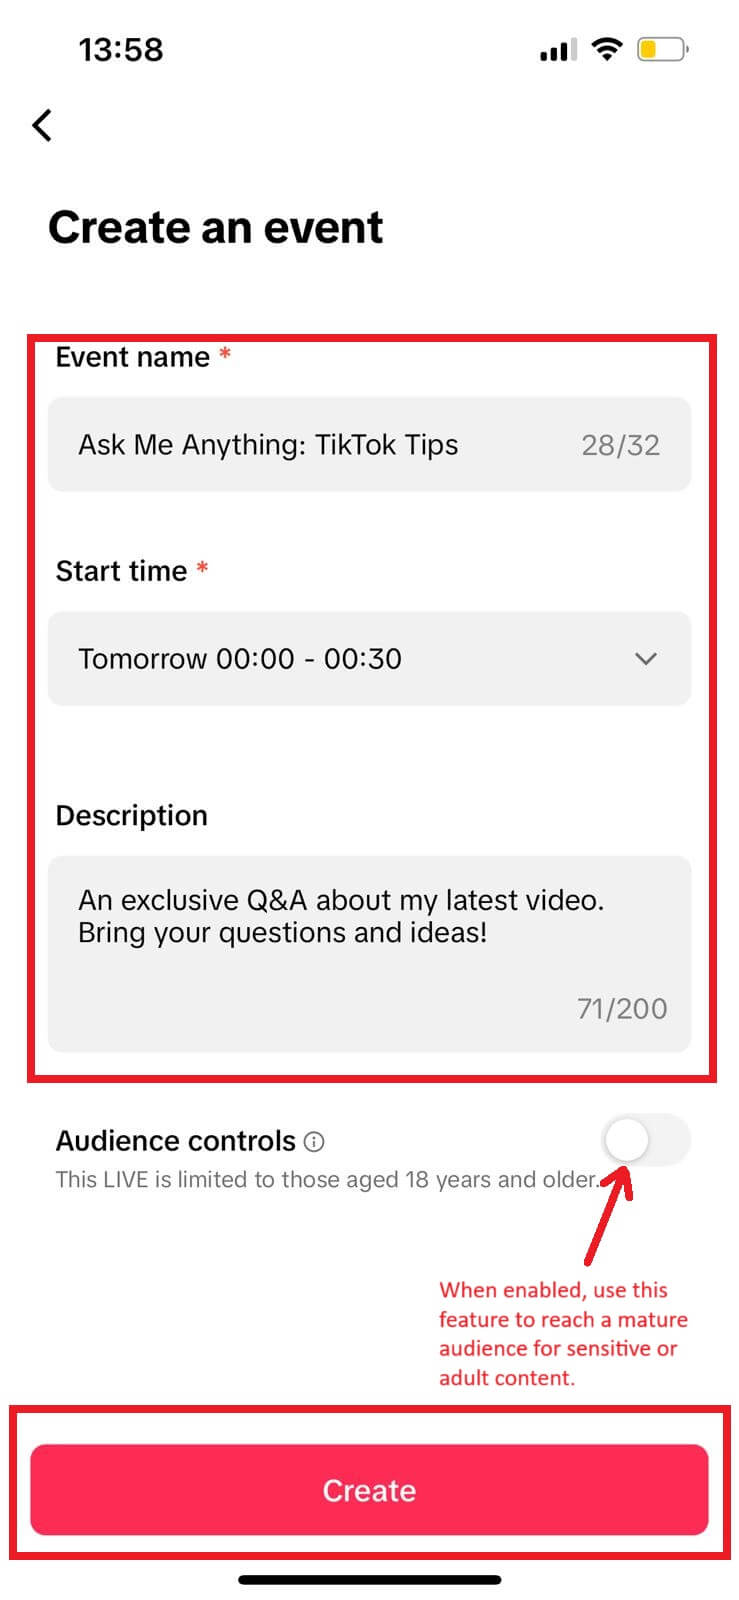
Step 7: Confirm Creation with Done Button
After creating your event, TikTok will review it. You’ll see a confirmation screen with a Done button to complete the process. TikTok will notify you once the event is approved.
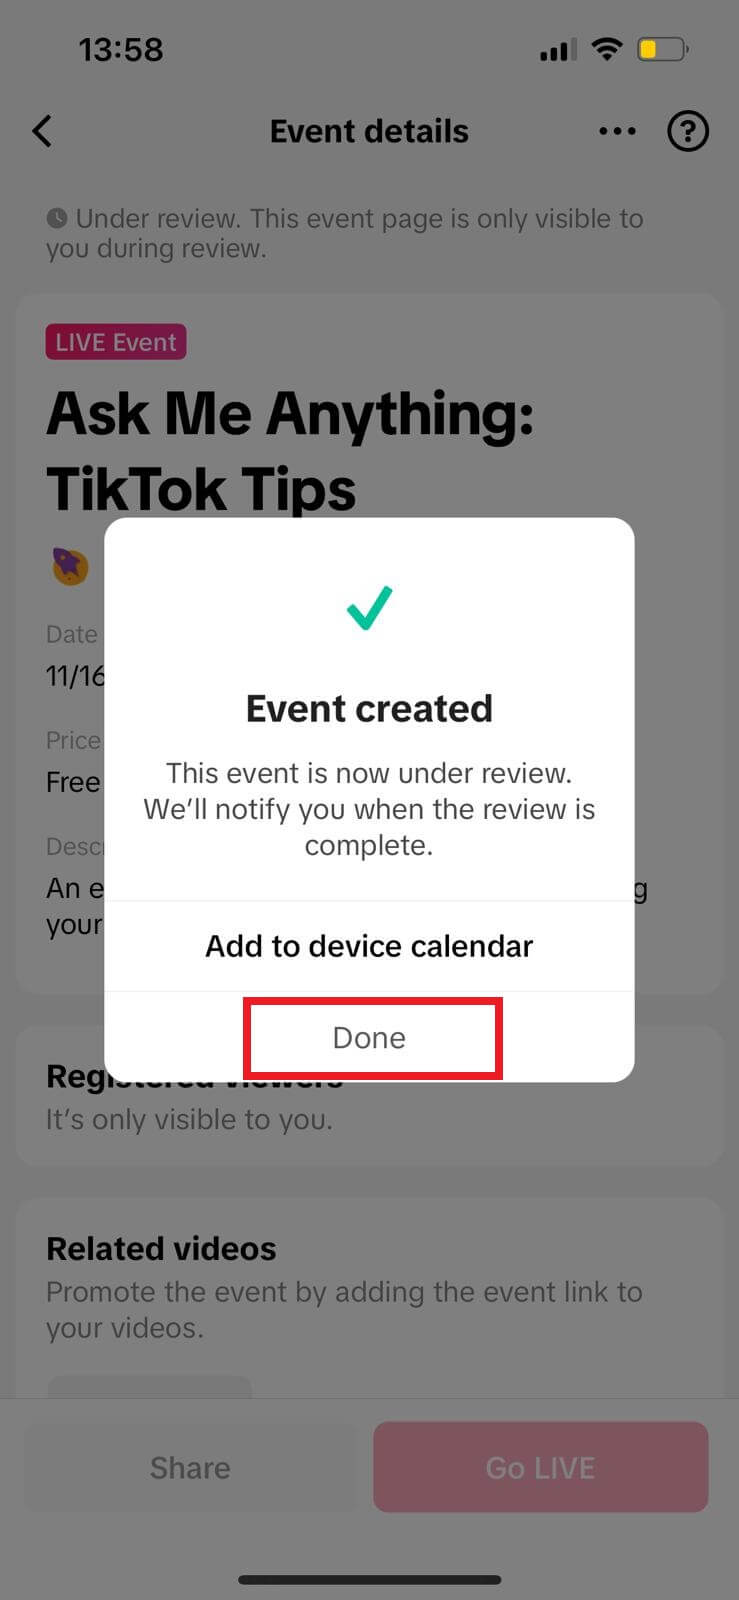
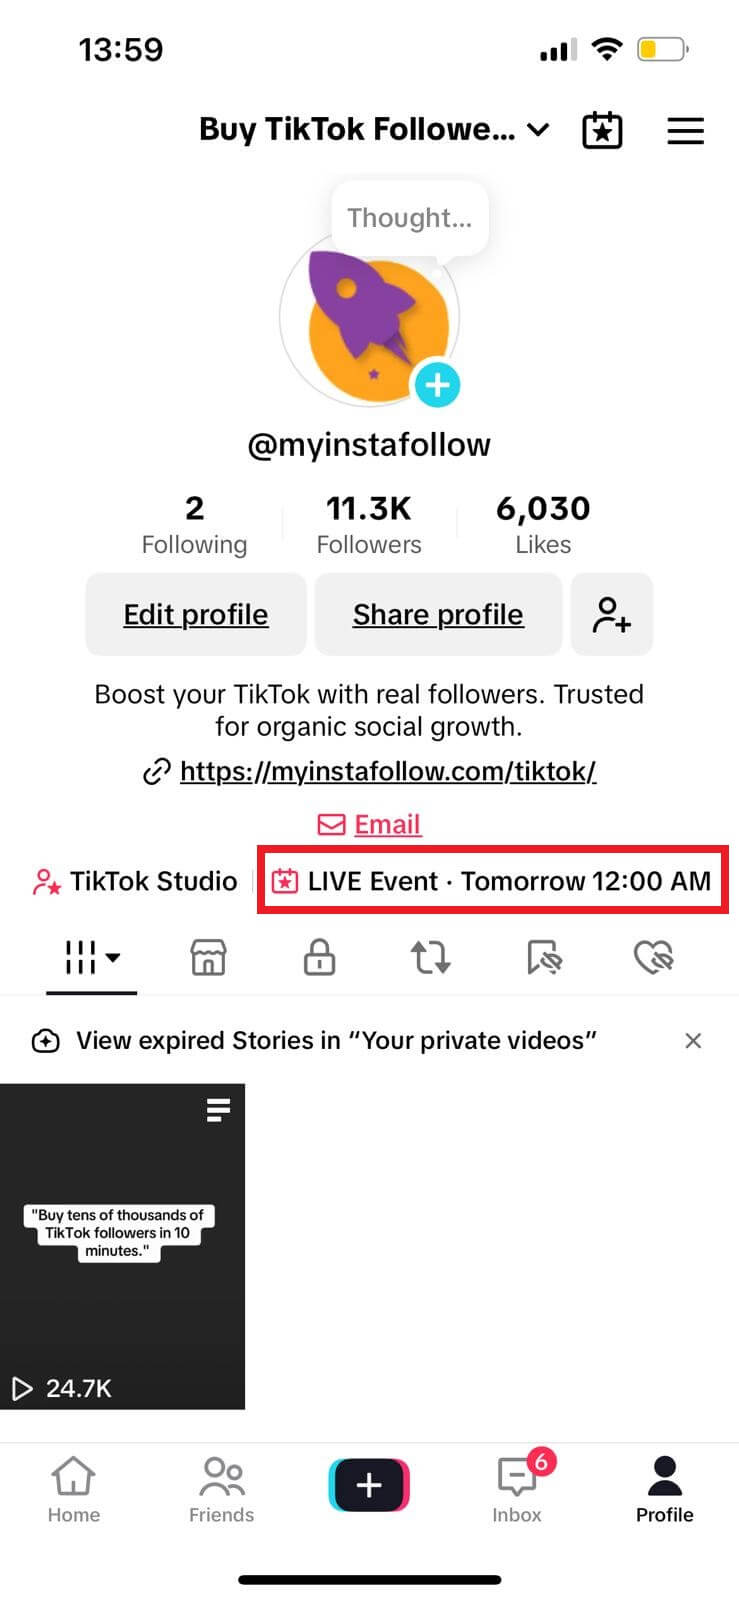
Step 8: Check How the Event Appears on Your Profile
Once approved, your Live event will appear on your TikTok profile for followers to see. This allows viewers to easily find your upcoming event and sign up.
By following these steps and tips, you’re well on your way to hosting a successful TikTok Live event that captivates your audience and grows your profile.

