Understanding Why Photos Turn Out Dark
Often, photos taken with an iPhone may appear darker than expected due to the camera's processing. Factors such as lighting conditions, camera settings, and even the subject matter can influence the outcome. This section will explore common reasons for dark photos and how to address them.
Method 1: Enabling Apple ProRAW for Unprocessed Images
This method involves using the RAW setting to capture unprocessed, natural photos. RAW images provide more flexibility in post-processing, allowing you to adjust exposure and shadows without compromising on quality.
- Open Settings on your iPhone.
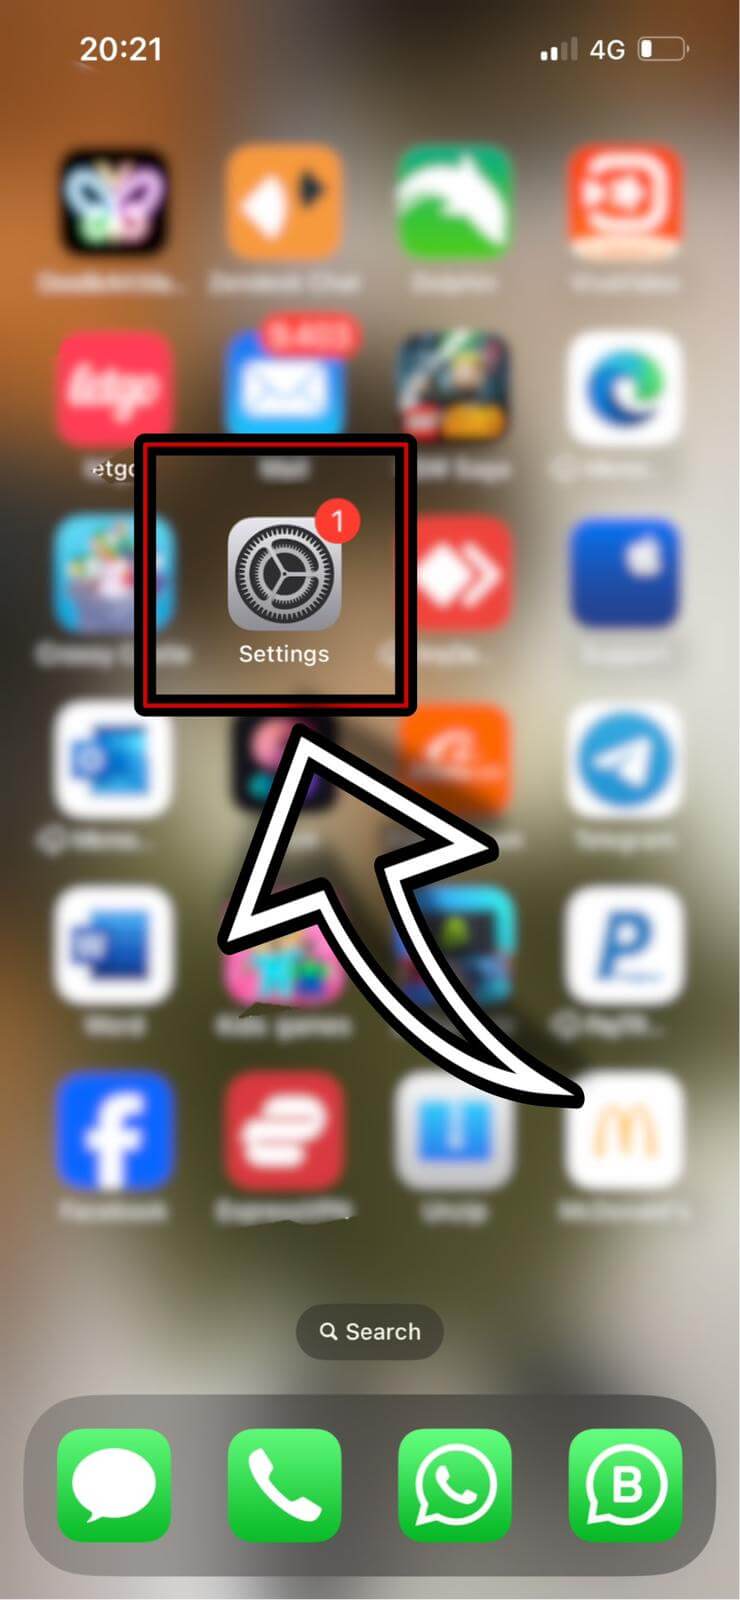
- Scroll to and select Camera.

- Tap on Formats.
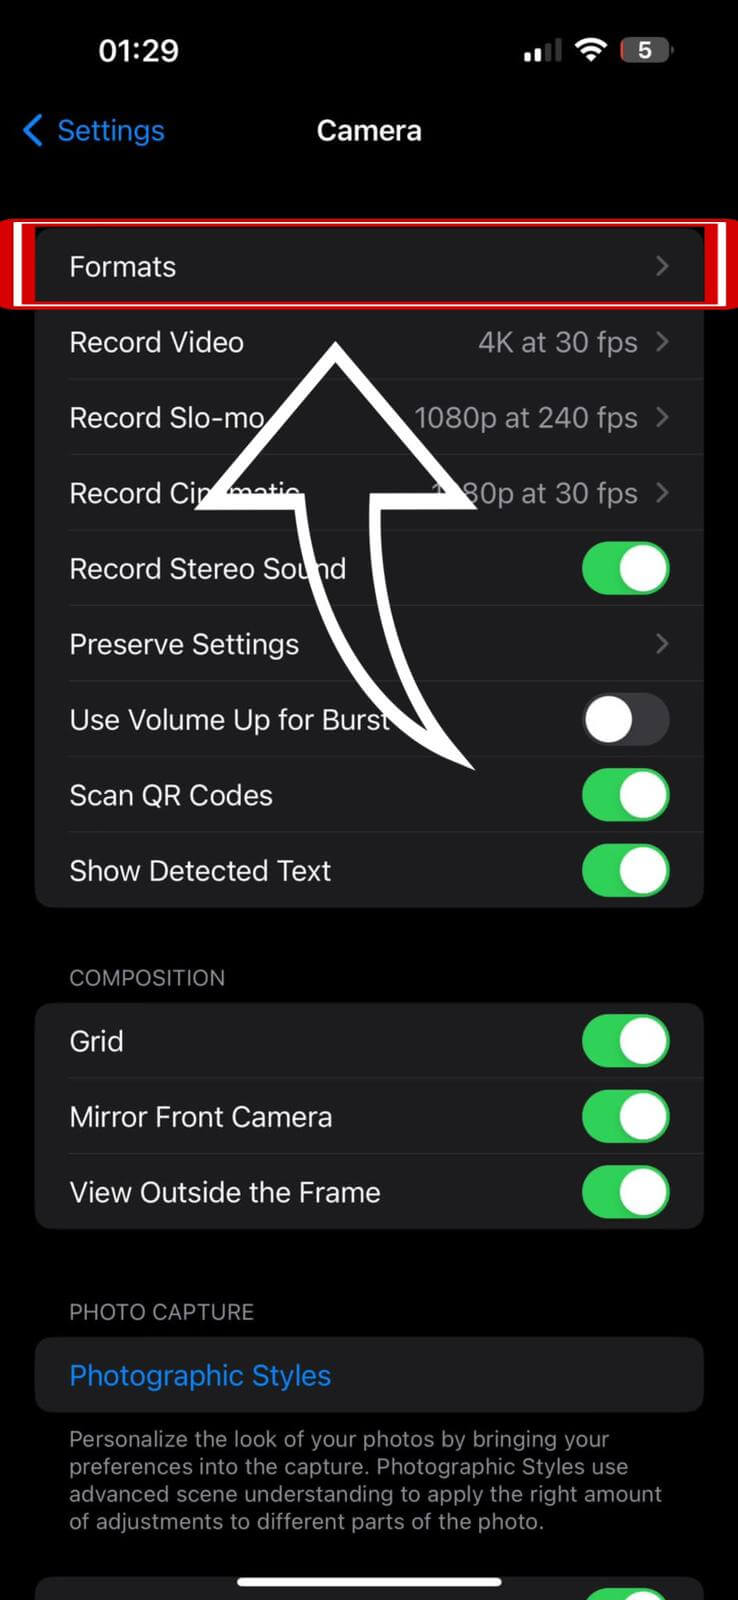
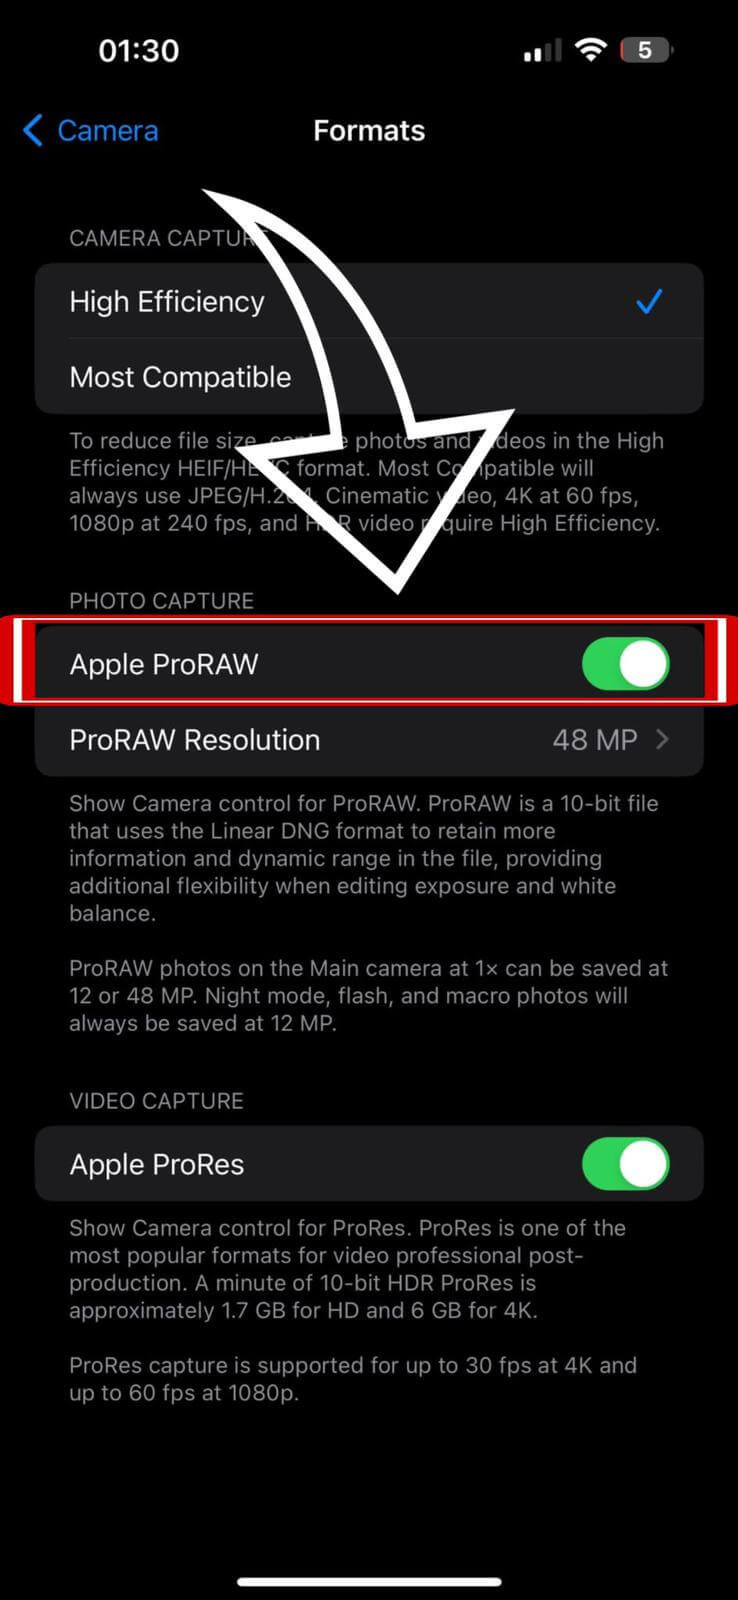
- Enable Apple ProRAW.
- Go back to the Camera app and activate the RAW setting.
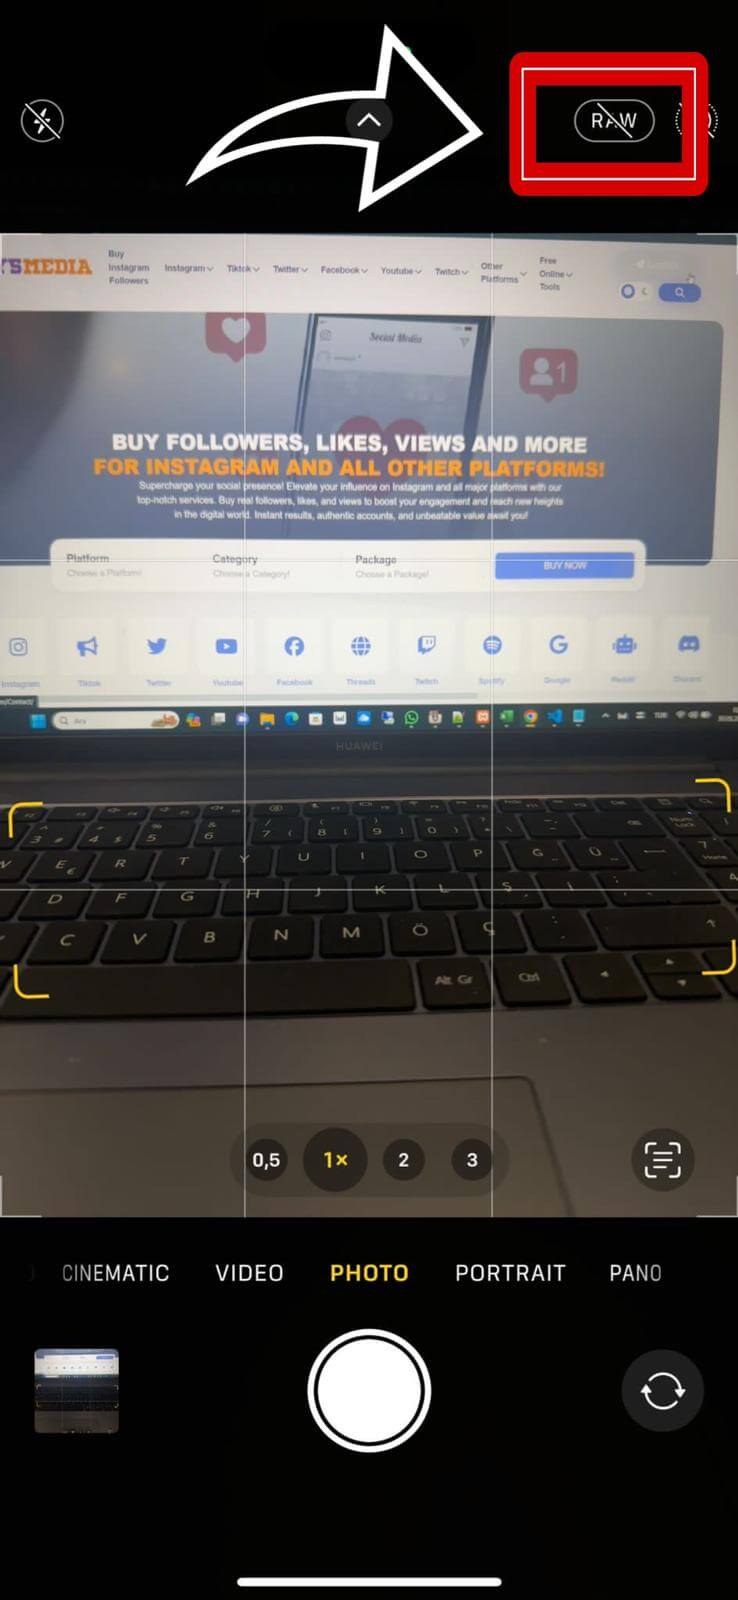
Photos taken in RAW will retain their natural lighting and detail, allowing for better post-processing.
Method 2: Capturing Burst Photos to Avoid Processing
Another technique is using the burst mode to take multiple photos quickly, which can result in more natural lighting. This mode captures several shots in rapid succession, giving you a range of photos to choose from.
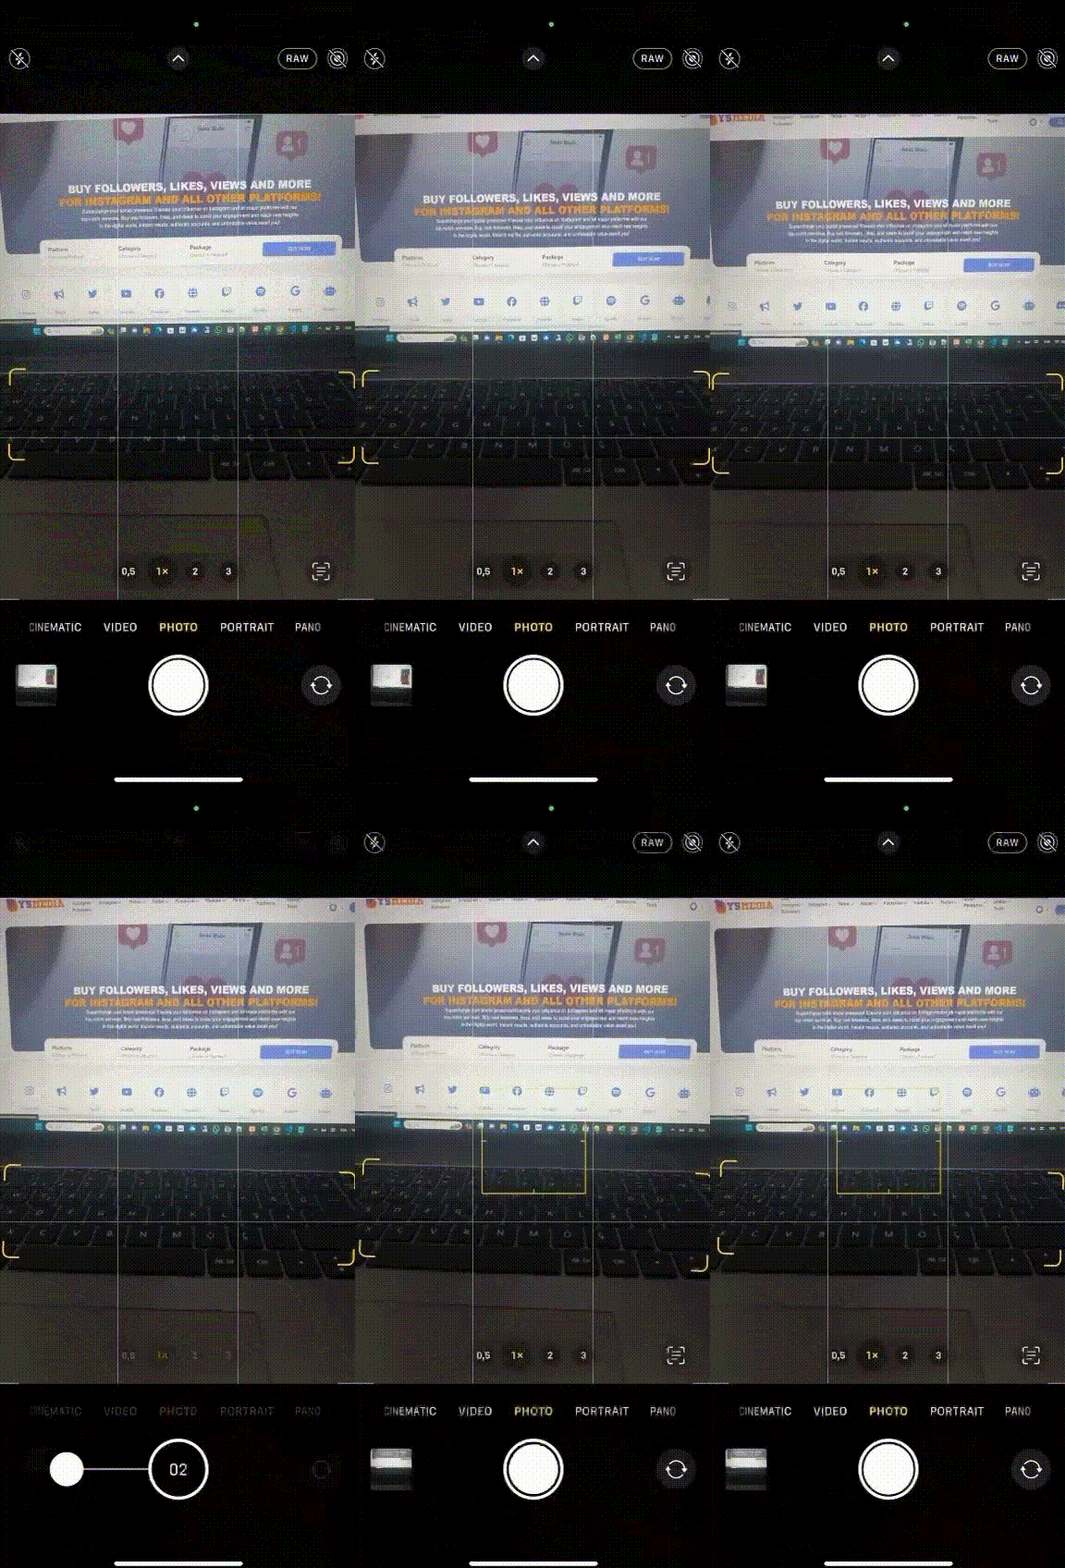
Press and hold the shutter button, then slide it to the left to capture a burst of photos, ideal for catching the perfect moment in changing light conditions.
When using burst mode, the iPhone doesn't process images, potentially resulting in brighter photos.
Additional Tips for Brighter iPhone Photos
Here are some extra tips to help you avoid dark photos:
- Adjust your iPhone's camera exposure manually before taking a shot.
- Use external lighting sources or reflectors to enhance natural light.
- Experiment with different camera modes and settings to understand what works best in various lighting conditions.


